
Keeping your dryer vent clean is very important for every home. A dirty dryer vent can cause many problems like longer drying times, higher energy bills, and even fire risks. Lint and dust build up inside the vent over time and block the airflow. When airflow is blocked, your dryer has to work harder, which wears it out faster. Cleaning the dryer vent yourself is a simple and money-saving task that anyone can do with basic tools. It improves safety and makes your dryer work better. Many people do not realize how quickly lint collects in the vent.
Regular cleaning helps your clothes dry faster and keeps your family safe from possible hazards. Learning how to clean a dryer vent yourself gives Dryer Vent Cleaning Los Angeles you confidence and helps you maintain your home appliances properly. This guide will explain everything in easy steps so you can do it safely and effectively. Taking good care prevents small issues from becoming expensive repairs later.
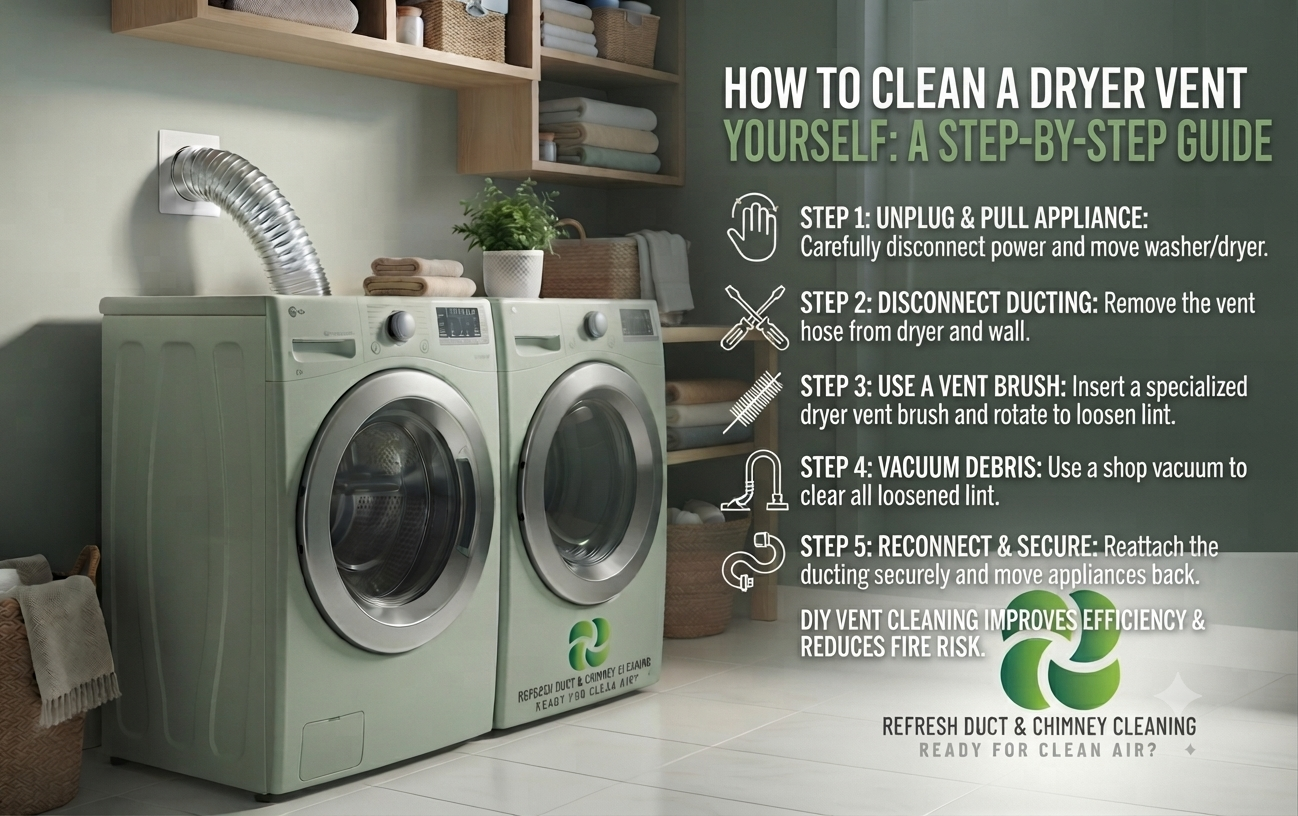
How to Clean a Dryer Vent Yourself
Cleaning a dryer vent yourself is easier than you might think. Start by gathering all the tools you need so you do not have to stop in the middle. Turn off the dryer and unplug it for safety before you begin. Remove the lint trap and clean it thoroughly with warm soapy water. Next,Dryer Vent Cleaning Los Angeles use a vacuum cleaner with a long hose attachment to reach inside the vent opening. Push the vacuum hose gently to suck out loose lint.
For deeper cleaning, a dryer vent brush kit works very well to scrub the inside walls. Work slowly from both the dryer end and the outside vent end if possible. Always wear gloves and a mask to avoid breathing in dust. After brushing, vacuum again to remove all the loosened debris. This simple process can make a big difference in how well your dryer performs. Repeat the brushing motion several times for better results. Check both ends to ensure no lint remains inside.
Why You Should Clean Your Dryer Vent Regularly
A clean dryer vent saves energy and reduces electricity costs. When the vent is blocked, hot air cannot escape properly, so the dryer runs longer than necessary. This extra running time increases wear on the heating elements and motor. Regular cleaning also lowers the risk of lint fires, which are a common cause of home fires. Lint is highly flammable and builds up quickly in hidden vents.
Cleaning every few months keeps your home safer and extends the life of your dryer. Many homeowners notice better drying results right after a good cleaning. It also prevents strange smells and moisture buildup that can lead to mold. Taking time to maintain the vent is a smart habit for every household. Good maintenance supports overall appliance health. It creates a safer living environment for everyone.
Signs That Your Dryer Vent Needs Cleaning
- Your dryer takes much longer than usual to dry clothes.
- Clothes feel hot or damp even after a full cycle.
- The outside vent cover does not push out strong airflow when the dryer runs.
- You see lint around the dryer or on the floor near it.
- The dryer makes unusual noises or shuts off early.
- A burning smell comes from the dryer during operation.
- These warning signs mean lint has built up inside the vent pipe.
- Ignoring them can lead to bigger problems and costly repairs.
- Checking these signs regularly helps you know when it is time to clean.
- Look for reduced performance in every load.
- Pay attention to any changes in sound or heat.
- It is a simple way to keep your laundry area clean and fresh.
- Many families notice these improvements after the first cleaning.
- Maintenance also prevents expensive service calls.
- Good habits lead to reliable appliance performance.
- It supports a healthier home environment overall. You save both time and money in the long run.
Tools and Materials Needed for Cleaning
You will need a few basic items that are easy to find. A vacuum cleaner with hose attachments is very useful. A flexible dryer vent cleaning brush kit helps reach deep inside. Screwdrivers are needed to remove covers and clamps. Gloves and a dust mask protect your hands and lungs. A flashlight helps you see inside dark spaces.
Mild soap and water clean the lint trap. Some people also use a leaf blower for pushing out stubborn lint from the outside. Having everything ready before starting makes the job faster and smoother. Prepare a drop cloth to catch falling lint. Organize tools in one place for easy access.
Safety Precautions Before Starting
Always unplug the dryer from the power outlet first. Turn off the gas supply if you have a gas dryer. Work in a well-ventilated area and wear protective gear. Do not use harsh chemicals that could damage the vent material. Be careful when climbing ladders if the outside vent is high. Keep children and pets away from the work area.
Check for any damaged vent pipes and replace them if needed. Following safety steps prevents accidents and makes the cleaning process worry-free. Work slowly and avoid forcing tools. Have a phone nearby in case of any issue. Double-check all connections after finishing.
Step 1: Prepare the Area and Dryer
Clear the space around the dryer for easy movement. Pull the dryer away from the wall carefully. Disconnect the vent hose from the back of the dryer. Clean the area behind the dryer to remove any fallen lint. Use a flashlight to inspect hidden corners. Wipe down surfaces to start fresh.
Step 2: Clean the Lint Trap and Exhaust
Remove and wash the lint screen thoroughly. Use a soft brush to clean all sides. Wipe the exhaust opening at the back of the dryer. Check for any tears in the screen. Dry it completely before putting back.
Step 3: Vacuum the Vent Opening
Attach the long hose to your vacuum. Insert it into the vent pipe and move it back and forth. Remove as much loose material as possible first. Work slowly and avoid forcing tools. Have a phone nearby in case of any issue. Double-check all connections after finishing.
Step 4: Use the Dryer Vent Brush
Push the flexible brush through the vent while twisting it. Pull it out slowly to bring out collected lint. Repeat several times from both directions. Work slowly and avoid forcing tools. Have a phone nearby in case of any issue. Double-check all connections after finishing.
Step 5: Clean from the Outside Vent
Locate the outside vent cover. Remove it and clean the opening thoroughly. Use the brush or vacuum from this end too. Wipe the cover before reinstalling. Work slowly and avoid forcing tools. Have a phone nearby in case of any issue. Double-check all connections after finishing.
Step 6: Reassemble and Test
Reconnect the vent hose securely. Push the dryer back into place. Run a short test cycle to check airflow. Listen for smooth operation. Work slowly and avoid forcing tools. Have a phone nearby in case of any issue. Double-check all connections after finishing.
Common Mistakes to Avoid When Cleaning
- Many people forget to unplug the dryer before starting.
- Using the wrong size brush can damage the vent pipes.
- Pushing too hard may bend flexible ducts.
- Skipping the outside vent cleaning leaves half the job undone.
- Not wearing a mask leads to breathing in harmful dust.
- Rushing the process often misses deep lint buildup.
- Avoid using water inside the vent pipes as it can cause rust.
- Checking your work after cleaning helps catch any mistakes.
- Learning from common errors makes future cleaning sessions better.
- Take breaks if the job feels tiring.
- Always inspect for damage during cleaning.
| Tool/Material | Purpose | Why It Is Important | Tips for Use | Frequency of Use | Alternative Option | Cost Level |
| Vacuum Cleaner with Hose | Remove loose lint | Sucks out surface debris quickly | Use long attachments for reach | Every cleaning session | Shop vacuum | Low to Medium |
| Flexible Dryer Vent Brush Kit | Scrub inside walls | Reaches deep buildup | Twist while pushing gently | Main tool for thorough clean | DIY wire hanger | Low |
| Screwdrivers | Remove covers and clamps | Allows access to hidden parts | Choose correct size | As needed | Multi-tool set | Low |
| Gloves and Dust Mask | Protection | Keeps hands clean and lungs safe | Wear throughout the process | Every time | Old cloth mask | Very Low |
| Flashlight | Visibility | Helps see inside dark vents | LED type works best | Every cleaning | Headlamp | Low |
| Mild Soap and Water | Clean lint trap | Removes stuck residue | Use warm water | After every load or cleaning | Vinegar solution | Very Low |
| Ladder (if needed) | Reach outside vent | Safe access to high vents | Stable and secure | When outside vent is elevated | Step stool | Medium |
| Leaf Blower (optional) | Push out lint | Clears stubborn blockages | Use on low setting | For heavy buildup | Compressed air | Medium |
| Replacement Vent Hose | Fix damaged parts | Maintains good airflow | Flexible or rigid as required | When old one is worn | Aluminum duct | Low to Medium |
| Lint Trap Brush | Extra cleaning | Gets small areas | Soft bristles only | Regular maintenance | Toothbrush | Very Low |
| Drop Cloth | Catch falling debris | Protects floor and walls | Place under work area | Every session | Old bedsheet | Very Low |
| Measuring Tape | Check vent length | Ensures proper reassembly | Note lengths before disconnecting | During deep cleans | None needed usually | Low |
Benefits of Regular Dryer Vent Maintenance
Regular cleaning improves energy efficiency and lowers bills. It makes clothes dry faster and feel softer. Your dryer lasts longer with less strain on parts. Fire risks decrease significantly. Better airflow reduces moisture problems inside the home. It is a simple way to keep your laundry area clean and fresh.
Many families notice these improvements after the first cleaning. Maintenance also prevents expensive service calls. Good habits lead to reliable appliance performance. It supports a healthier home environment overall. You save both time and money in the long run.
How Often Should You Clean the Vent
Clean the vent at least twice a year. Homes with frequent dryer use need cleaning more often. Check signs monthly. Families with large loads should clean quarterly. Track your usage to decide the schedule.
Choosing the Right Cleaning Tools
Pick brushes designed for dryer vents. Avoid very stiff brushes. Quality tools make the job easier. Read labels for compatibility. Start with basic kits. Work slowly and avoid forcing tools. Have a phone nearby in case of any issue. Double-check all connections after finishing.
Dealing with Heavy Lint Buildup
Work in sections for heavy cases. Use vacuum between brush passes. Be patient with stubborn lint. Soak brush if needed. Multiple passes ensure better clean. Work slowly and avoid forcing tools. Have a phone nearby in case of any issue. Double-check all connections after finishing.
Maintaining Flexible vs Rigid Vents
Flexible vents need more frequent checks. Rigid vents are easier to clean. Choose rigid when replacing. Inspect for kinks or tears. Proper type improves airflow. Work slowly and avoid forcing tools. Have a phone nearby in case of any issue. Double-check all connections after finishing.
When to Call a Professional
If you cannot reach the vent safely. For very old or damaged systems. When cleaning does not improve airflow. Complex installations need experts. For multi-story homes. Work slowly and avoid forcing tools. Have a phone nearby in case of any issue. Double-check all connections after finishing.
Preventing Future Buildup
Clean the lint trap after every load. Use dryer balls to reduce lint. Avoid overloading the dryer. Shake clothes before drying. Use correct heat settings. Work slowly and avoid forcing tools. Have a phone nearby in case of any issue. Double-check all connections after finishing.
Eco-Friendly Cleaning Methods
Use natural brushes and minimal chemicals. Proper ventilation helps naturally. Reuse old towels for wiping. Avoid plastic tools when possible. Focus on mechanical removal. Work slowly and avoid forcing tools. Have a phone nearby in case of any issue. Double-check all connections after finishing.
Additional Tips for Best Results
- Take photos before and after cleaning to see the difference.
- Label your tools so they are easy to find next time.
- Write down the cleaning date in a home maintenance notebook.
- Teach other family members the basic steps for safety.
- Check the vent after storms or heavy use.
- Combine vent cleaning with other dryer maintenance tasks.
- Small habits lead to big improvements over time.
- Stay consistent with your cleaning schedule for the best outcome.
- Consider an annual professional inspection for peace of mind.
- Store tools together in a laundry kit. Share tips with friends and family.
- Work slowly and avoid forcing tools.
- Have a phone nearby in case of any issue.
- Double-check all connections after finishing.
Conclusion
Cleaning your dryer vent yourself is a valuable skill that brings many benefits to your home. It saves money on energy and repairs while keeping your family safer. The process uses simple tools and easy steps that almost anyone can follow. Regular Dryer Vent Cleaning Los Angeles maintenance prevents small problems from becoming big expensive issues. You gain confidence and control over your household appliances. A clean vent makes daily laundry tasks faster and more efficient.
Following the safety tips and avoiding common mistakes ensures good results every time. Start making dryer vent cleaning part of your routine today. Your dryer will thank you with better performance and longer life. Enjoy fresher, quicker drying and peace of mind knowing you reduced fire risks. Taking care of this hidden but important part of your home is truly worthwhile. It creates lasting improvements for years to come. (11 lines)
FAQs
1. How long does it take to clean a dryer vent yourself?
The whole process usually takes between 30 minutes to one hour depending on how dirty the vent is. First-time cleaners may need a little extra time to learn the steps. With practice, it becomes much faster. Regular cleaning keeps the buildup light and makes the job quicker each time. Plan extra time for heavy buildup cases. (5 lines)
2. Can I clean the dryer vent without any special tools?
Yes, you can start with a vacuum cleaner and a long hose. However, a dedicated vent brush makes the job more effective and thorough. Basic household items work for light cleaning. Investing in a simple kit is helpful for better results. Improvise safely with available items. (5 lines)
3. Is it safe to clean the vent while the dryer is plugged in?
No, always unplug the dryer first. This prevents any accidental start and keeps you safe from electrical hazards. Safety should be the top priority. Double-check that the power is off before touching any parts. Follow this rule every single time. (5 lines)
4. What is the best time of year to clean the dryer vent?
Any time is good, but spring and fall are popular choices. Cleaning before heavy seasonal use helps the dryer work efficiently. Pick a convenient day when you have enough time. Consistency matters more than the exact season. Align with other home maintenance. (5 lines)
5. How do I know if the vent is completely clean?
Strong airflow from the outside vent is a good sign. The dryer should finish cycles faster than before. No visible lint should come out when you run a test. Check both ends of the vent for cleanliness. Test with a full load of towels. (5 lines)
6. Can a dirty dryer vent cause clothes to smell bad?
Yes, trapped lint and moisture can create musty odors. Cleaning removes the source of the smell. Fresh airflow keeps clothes smelling clean. This is one of the first benefits people notice. Wash lint trap regularly too. (5 lines)
7. Should I clean the vent more often if I have pets?
Yes, pet hair adds to lint buildup faster. Extra cleaning helps maintain good airflow. Check the lint trap more frequently too. Pet owners often benefit from quarterly deep cleans. Use lint rollers on clothes first. (5 lines)
8. What happens if I never clean my dryer vent?
Lint buildup increases fire risk and makes the dryer work harder. Energy bills go up and the machine may break down sooner. Clothes take longer to dry. Regular cleaning prevents all these problems. It can also void warranties in some cases. (5 lines)
9. Can I use water to clean inside the dryer vent?
It is better to avoid water inside the pipes. Use dry methods like brushing and vacuuming. Water can cause rust or mold in some vent materials. Dry cleaning is safer and more effective. Wipe external parts only with damp cloth. (5 lines)
10. Do I need to replace the vent hose after cleaning?
Only if it is damaged, cracked, or very old. Most hoses last longer with regular cleaning. Inspect it during each cleaning session. Good quality hoses make maintenance easier. Replace every few years preventively. (5 lines)