
Maintaining a clean dryer vent is one of the most important aspects of home safety and appliance efficiency. Over time, lint, dust, and debris naturally accumulate within the exhaust duct, creating a restriction that forces your dryer to work significantly harder than intended. This process not only leads to longer drying times and higher energy bills but also poses a serious fire risk if left unaddressed.
By using the right tools, Dryer Vent Cleaning Los Angeles homeowners can effectively remove these obstructions and keep their airflow clear. Understanding the specific equipment required for this maintenance task allows you to perform the job safely and thoroughly. Whether you are a first-time.
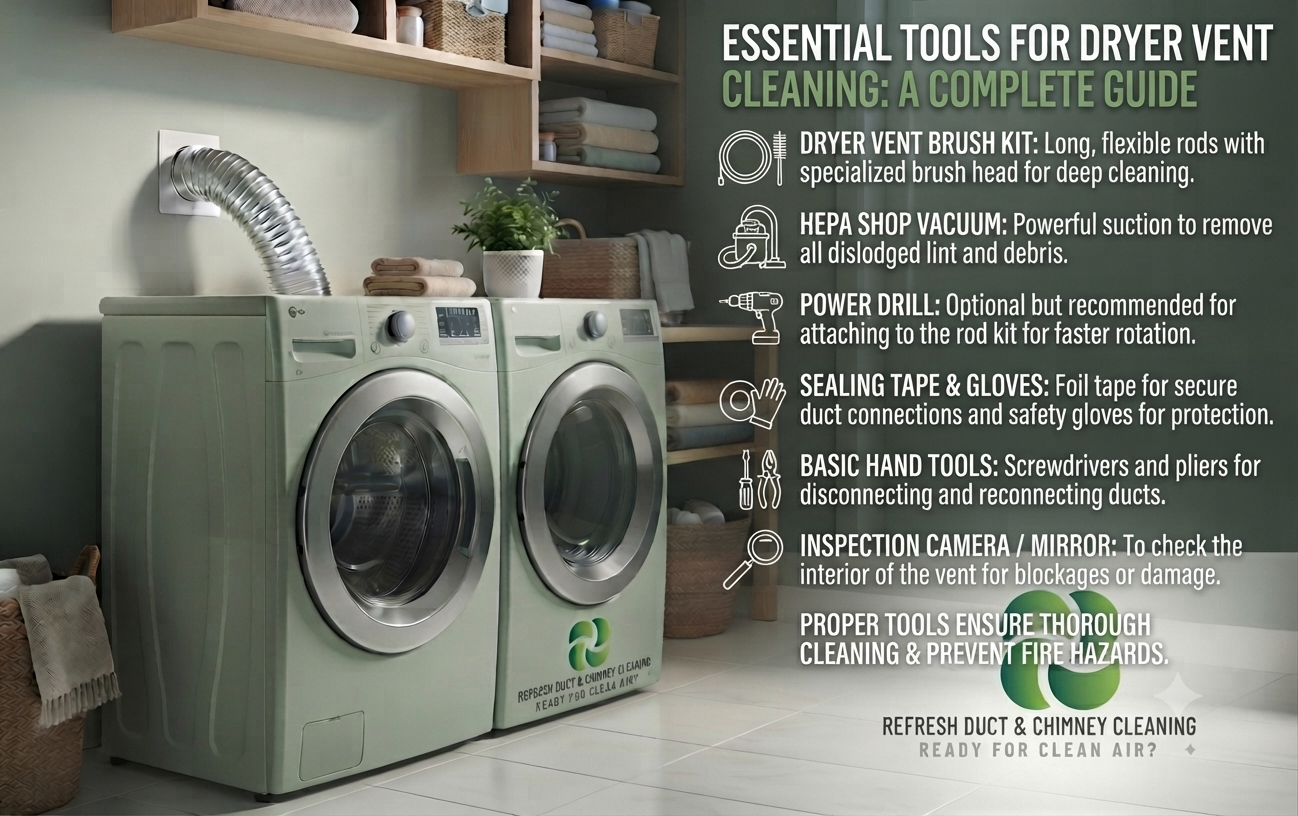
What Tools Are Used for Dryer Vent Cleaning?
When it comes to dryer vent cleaning, having a specialized set of tools makes the entire process more manageable and efficient. The most basic requirement is a high-powered vacuum, ideally one with an extension hose or attachment that can reach into the dryer port. Additionally, specialized vent brushes are crucial for scrubbing the interior walls of the ductwork to loosen caked-on lint. These brushes often come with flexible rods that can navigate corners and long stretches of pipe.
For more complex systems, rotary brush kits that attach to a power drill are frequently used to provide a deeper clean. You will also need basic hand tools like screwdrivers to remove the vent cover and foil tape for sealing any loose joints. Having this toolkit ready ensures that you can handle the job from start to finish without needing to improvise with ineffective household items.
Selecting the Right Vacuum for Lint Removal
A reliable vacuum is the cornerstone of any effective dryer vent cleaning toolkit. While a standard household canister or upright vacuum can work for the initial exterior cleaning, a shop-style vacuum with a strong suction motor is significantly better for deep cleaning.
The goal is to pull out loose lint that has settled deep within the pipe, so having a long, narrow crevice tool is vital. Some professionals use vacuums with HEPA filters to ensure that the fine dust and debris pulled from the vent are contained and do not circulate back into the room. If your vacuum has a blower function.
The Role of Flexible Vent Brushes
- Flexible vent brushes are designed specifically to traverse the winding paths of most dryer duct systems.
- Unlike rigid brushes, these tools feature a long, pliable rod that can bend around corners and navigate through tight spaces without damaging the pipe.
- The brush head is Dryer Vent Cleaning Los Angeles usually made of durable synthetic bristles that are firm enough to scrape away stubborn lint but soft enough not to puncture thin metal ductwork.
- By inserting the brush and rotating it manually or with a drill, you can dislodge debris that has adhered to the walls of the vent over months of use.
- These brushes are indispensable for reaching the sections of the pipe that are hidden inside walls or behind appliances. Using a flexible brush correctly is the secret to restoring full, unimpeded airflow to your dryer’s exhaust system.
Utilizing Drill-Powered Rotary Kits
For a more professional level of cleaning, drill-powered rotary kits are the go-to solution for many homeowners. These kits include a specialized brush head that connects to a series of interlocking, flexible rods, which are then attached to a standard cordless drill.
As you pull the trigger, the brush spins rapidly, effectively scouring the interior of the duct and breaking up hardened lint plugs that manual scrubbing might miss. This method is exceptionally efficient for long or heavily clogged vent runs that require more mechanical force.
Specialized Crevice Tools
Crevice tools are essential attachments that allow you to direct suction into tight, narrow spaces behind the dryer. These tools help grab lint that is trapped in the corners of the duct or deep within the dryer’s exhaust port. They are designed to fit into narrow gaps, ensuring that no pocket of debris is left behind.
High-Quality Duct Brushes
Duct brushes come in various sizes and shapes, tailored to the diameter of your specific venting system. Using a brush that is too small won’t clean the walls, while one that is too large might get stuck. Choosing the correct size ensures an even and complete cleaning of the entire circumference of the pipe.
Flexible Extension Rods
Extension rods are the backbone of your cleaning setup, allowing you to reach deep into long ductwork runs. These rods must be flexible enough to bend around turns but sturdy enough to transfer the torque from your hand or drill. Quality rods ensure you can reach the full length of the vent from the outside or inside.
Protective Gear for Safety
Safety gear, including dust masks and safety glasses, is crucial when cleaning dryer vents to protect yourself from airborne lint and debris. As you agitate the vent, a significant amount of dust will be released, which can irritate your lungs and eyes. Wearing appropriate protection makes the process much safer and more comfortable.
Foil Tape for Repairs
Metallic foil tape is the only approved material for sealing joints and repairing holes in dryer vent ducts. Unlike standard plastic duct tape, foil tape can withstand the heat generated by the dryer without melting or losing its adhesive properties. Keeping a roll on hand allows you to instantly fix any leaks you find during the cleaning process.
Inspection Mirrors
Small, extendable inspection mirrors are very helpful for looking inside the vent or behind the dryer to check for blockages. They allow you to see areas that are otherwise hidden from your direct line of sight. Using a mirror can help you confirm if your cleaning efforts have been successful or if more work is needed.
Essential Safety and Preparation Tools
- Before beginning the cleaning process, you must ensure you have the right tools to safely access and prepare the vent area.
- A sturdy ladder may be necessary if your exterior vent hood is located high up on an outside wall or under an eave.
- Additionally, having a set of basic hand tools like screwdrivers or a socket wrench is essential for unscrewing the vent cover and loosening the clamps that secure the hose.
- It is also wise to have a drop cloth or old towel ready to place under the connection points to catch the large clumps of lint that will inevitably fall out.
- Preparing your workspace with these items prevents damage to your flooring and keeps the surrounding area clean.
- Taking the time to gather these essentials upfront allows you to focus on the task of cleaning without constant interruptions.
| Tool Name | Primary Purpose | Key Benefit | Use Case |
| Shop Vacuum | Suction removal | Deep debris extraction | Removing loose lint from ports |
| Flexible Brush | Manual scrubbing | Dislodging stuck lint | Cleaning short or simple vents |
| Rotary Brush Kit | Power cleaning | Breaking up hard plugs | Long, heavily clogged ducts |
| Crevice Tool | Targeted suction | Accessing narrow gaps | Cleaning dryer intake ports |
| Inspection Mirror | Visual check | Identifying hidden blocks | Verifying clean duct walls |
| Foil Tape | Sealing joints | Ensuring airtight seals | Repairing damaged duct seams |
| Work Gloves | Hand protection | Preventing cuts/scrapes | Handling metal edges and pipes |
| Dust Mask | Respiratory safety | Filtering airborne lint | During active agitation/cleaning |
Maintenance Tools for Long-Term Success
To ensure your dryer vent remains clear long after the initial cleaning, you should keep a small “maintenance kit” stored near your laundry area. This kit should include a bottle of compressed air for light dusting, a small brush for the exterior hood, and a spare clamp or two.
By performing mini-checks every few months, you can prevent the major buildup that requires intensive cleaning. Regularly cleaning the lint screen after every single load is also a form of preventative maintenance that reduces the amount of debris entering your vent system.
Lint Screen Brushes
A specialized lint screen brush is designed to fit into the trap where you normally clean the filter. Over time, fabric softeners can create a waxy buildup on the screen that restricts airflow. A good brush helps remove this residue, allowing the dryer to breathe properly throughout the drying cycle.
Compressed Air Canisters
Compressed air is useful for blowing out dust from the dryer’s internal components or the lint trap housing. It is a quick and effective way to clear fine particles that are difficult to reach with a vacuum. Using this periodically keeps the dryer’s internal air path clean and efficient.
Exterior Hood Maintenance Brush
A long-handled, soft-bristled brush is perfect for cleaning the outside of your vent hood without needing to climb a ladder. Keeping the exterior flaps clear of spider webs and leaves ensures they open easily. This simple action allows hot air to escape the system effectively and prevents backpressure.
Replacement Vent Clamps
Over time, the metal clamps that hold your vent hose in place can become stripped or lost. Having a few spares on hand ensures that you can always re-secure the hose tightly. A loose hose is a primary cause of lint leaking behind the dryer and into your home.
Flashlight for Visibility
A powerful LED flashlight is an essential tool for seeing into the dark recesses behind the dryer. Proper lighting helps you spot potential hazards like crushed hoses, disconnected pipes, or rodent nests. Clear visibility is the key to identifying maintenance needs that would otherwise be missed.
Storage Organizer
Keeping all your vent cleaning tools in a single, dedicated organizer makes maintenance much more likely to happen. When you don’t have to hunt for your brushes, tape, or vacuum attachments, the job becomes significantly easier. A well-organized kit is the best tool for consistent and reliable home care.
Ensuring Proper Tool Storage and Safety
- Proper storage of your dryer vent cleaning tools is just as important as the cleaning process itself.
- Since most of these tools are used infrequently, keeping them in a clean, dry area prevents the rods and brushes from rusting or degrading over time.
- Make sure that your flexible rods are stored in a coiled or straightened position that does not put permanent kinks in the material, which would make them difficult to use later.
- It is also vital to keep your drill-powered accessories away from moisture to protect the metal components from corrosion.
- By organizing your tools in a dedicated bin, you ensure that you are ready to perform maintenance the moment you notice the first signs of slow drying.
- Remember, safe tools lead to a safer home, and keeping your equipment in peak condition is a key part of your responsibility as a homeowner.
Conclusion
Mastering the use of dryer vent cleaning tools is an empowering way to improve your home’s safety and appliance efficiency. By utilizing specialized items like flexible brushes, rotary kits, and high-powered vacuums, you can effectively eliminate the lint and debris that threaten your dryer’s performance. Remember that the goal of these tools is to restore clear, unrestricted airflow, which reduces your energy usage and prevents the buildup of flammable materials.
While the process requires a bit of effort and the right preparation, the results—faster drying times, lower utility bills, and peace of mind—are well worth it. Always prioritize safety by wearing protective gear and inspecting your work thoroughly after each cleaning session.
Frequently Asked Questions
1. How often do I need to use these vent cleaning tools?
For most households, using your cleaning tools to perform a thorough vent maintenance check once every six to twelve months is ideal. If you notice your dryer taking longer than normal to dry clothes, you should use your tools sooner.
2. Can I use a drill for all types of dryer vents?
Rotary drill kits are excellent for most standard metal venting, but you should be cautious if your home uses very thin or fragile plastic piping. Always inspect your duct material first to ensure it can withstand the mechanical force of a rotary brush.
3. What is the most important tool in my kit?
A strong vacuum is arguably the most important tool because it removes the actual lint and debris from the system. Without a way to suck out the material you have loosened with your brushes, the lint will simply remain trapped in the duct.
4. Why is foil tape better than regular duct tape?
Foil tape is designed specifically to handle high heat, which is essential for dryer vents that get very hot during operation. Regular plastic duct tape will eventually melt, become brittle, or lose its adhesion, which can lead to leaks and safety hazards.
5. How do I know if my cleaning tools are working?
You will know your tools are working effectively if you see a significant reduction in drying time after your cleaning session. Additionally, you should observe increased air pressure coming from the exterior vent hood when the dryer is running.
6. Do I need a professional if I have these tools?
Having the right tools allows you to handle most routine cleaning, but you should call a professional if you have very long or complex ducts that require specialized inspection cameras. Professionals can also handle repairs that are beyond the scope of basic DIY tools.
7. Are there tools to help with exterior vent cleaning?
Yes, long-handled brushes and specialized exterior hood cleaning attachments are great for reaching outside vents. These allow you to clear external blockages like bird nests or leaves without needing to access the vent from the inside or climb high ladders.
8. What should I do if a brush gets stuck in the vent?
If a brush gets stuck, stop immediately and do not force it, as you could damage the duct. Try to gently rotate the rod in the opposite direction or use a second tool to reach in and guide the brush head back out carefully.
9. Can compressed air replace brushes?
Compressed air is great for light dust, but it is not powerful enough to remove the thick, matted lint plugs that accumulate in long ducts. Brushes are necessary for mechanically loosening and pulling out heavy lint buildup that blocks airflow.
10. How do I store my flexible vent rods properly?
Store your flexible rods in a location that is cool and dry to prevent the material from becoming brittle or rusting. Avoid sharp bends in the storage container, as these can create permanent kinks that make the rods difficult to use during your next cleaning.