
Leaking dryer vents create problems that affect both your appliance performance and home safety. When hot air, moisture, and lint escape from cracks or loose connections, the entire drying process becomes less effective. These leaks often develop gradually from normal wear or poor installation. Homeowners may notice higher energy bills, longer drying times, and unusual odors as early warnings.
Addressing leaking dryer vent issues promptly prevents moisture damage to walls and floors. A well-sealed vent system ensures proper exhaust and reduces fire risks associated with lint buildup. Understanding common leaking problems helps you maintain better laundry efficiency. Simple checks and repairs can resolve most issues before they worsen. Good vent care keeps your dryer working reliably for years.
Leaking Dryer Vent Issues
Leaking dryer vent issues occur when air and lint escape from damaged or poorly connected parts of the system. You might see lint dust around the dryer or feel warm air escaping from joints. Dryer Vent Cleaning Los Angeles These leaks reduce drying efficiency and force the machine to run longer.
Moisture from leaks can lead to mold growth in nearby areas. Fixing leaks improves safety by directing exhaust outside properly. Many leaks result from aging hoses or loose connections over time. Regular inspection helps catch these problems early. Quick repairs restore full function and prevent bigger headaches.
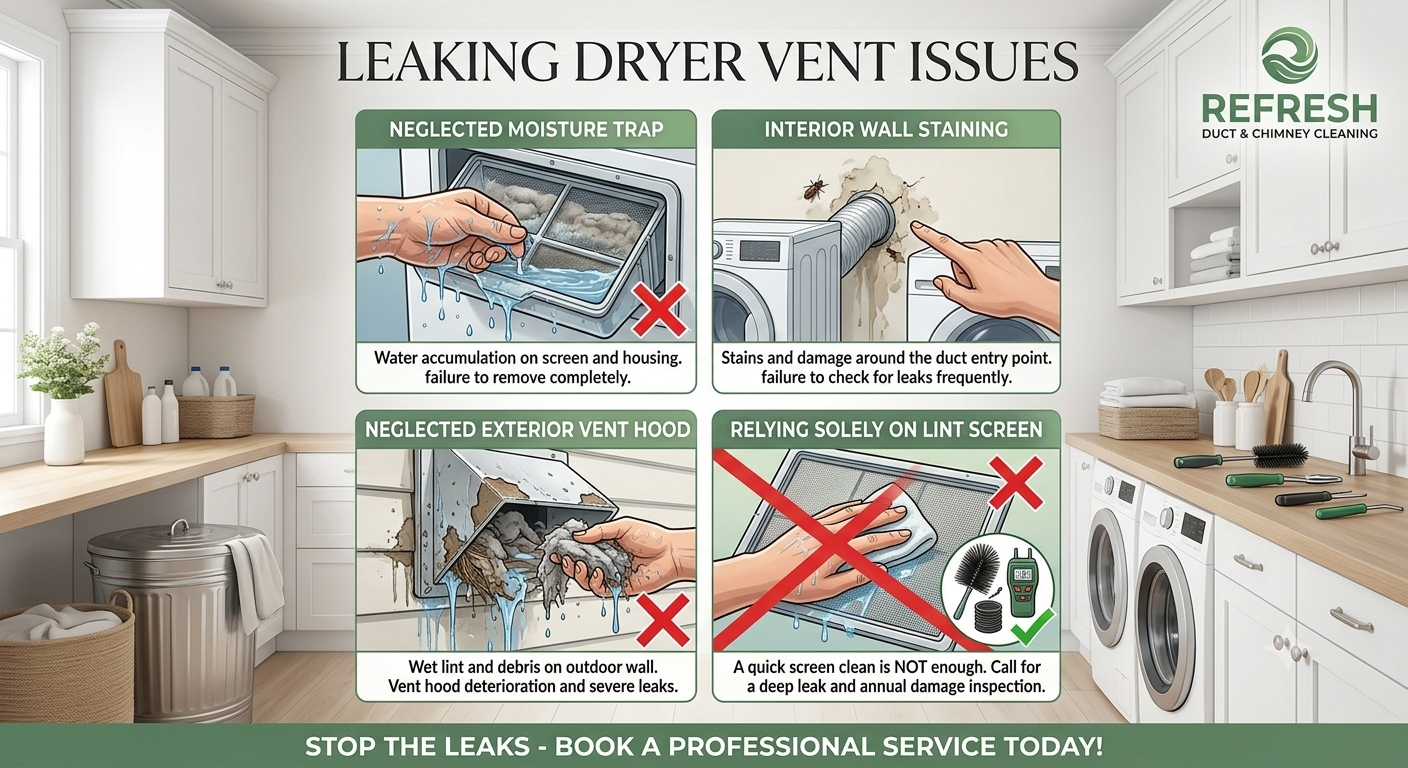
Causes of Leaking Dryer Vents
Several common causes lead to leaking dryer vent issues in homes. Flexible hoses can crack or tear after years of use and movement. Poor installation with too many bends or incorrect sealing creates weak points. Rodents or physical damage may create holes in the ductwork. Loose clamps at connections often fail over time and allow leaks.
Using low-quality materials that degrade quickly contributes to the problem. Heavy lint buildup adds pressure that worsens existing small leaks. Understanding these causes helps with both prevention and repair. Proper setup from the beginning reduces future leaking risks significantly.
Dangers of Ignoring Leaking Vents
- Ignoring leaking dryer vent issues creates multiple safety and efficiency problems.
- Escaping lint increases fire hazards around the dryer area.
- Moisture leaks promote mold and mildew growth that affects indoor air quality.
- Higher energy consumption results from the dryer working harder to compensate.
- Clothes may not dry fully, leading to musty smells and repeated cycles.
- Structural damage to walls or cabinets can occur from prolonged moisture exposure.
- Feel for warm air escaping from connections while the machine runs.
- Listen for hissing sounds that indicate air leaks. Check the outdoor vent hood for reduced airflow compared to normal.
- Use a smoke stick or incense to detect air movement at joints.
- These simple detection methods reveal most common leaks.
- Regular checks make identification easier over time.
- Early detection allows for simpler and cheaper fixes.
- Carbon monoxide risks rise in some cases if exhaust does not vent properly.
How to Identify Leaking Dryer Vents
Identifying leaking dryer vent issues starts with careful observation during operation. Look for visible lint accumulation around the back of the dryer or along the hose. Feel for warm air escaping from connections while the machine runs. Listen for hissing sounds that indicate air leaks.
Check the outdoor vent hood for reduced airflow compared to normal. Use a smoke stick or incense to detect air movement at joints. These simple detection methods reveal most common leaks. Regular checks make identification easier over time. Early detection allows for simpler and cheaper fixes.
Checking Connections and Joints
Start by inspecting all connections between the dryer, hose, and wall outlet. Tighten any loose clamps and look for gaps in sealing tape. Feel around joints for escaping air during a cycle. Replace worn gaskets or seals as needed. Secure connections prevent most minor leaks effectively. This basic check often resolves simple leaking problems quickly.
Inspecting the Vent Hose
Examine the entire length of the vent hose for cracks, holes, or sagging sections. Flexible hoses are particularly prone to damage over time. Look for lint buildup that indicates escape points. Straighten any kinks that restrict flow and cause pressure leaks. Replacing damaged sections restores proper sealing and efficiency.
Testing Airflow and Exhaust
Run a short cycle and test exhaust strength at the outdoor vent. Weak airflow combined with indoor leaks confirms issues. Use your hand or a tissue to detect escaping air indoors. Proper exhaust should be strong and consistent outside. Testing helps verify repairs after fixing leaks.
Looking for Moisture and Mold Signs
Moisture around the dryer or on nearby walls signals leaking vents. Musty smells or visible mold growth often accompany leaks. Address both the leak source and any resulting damage promptly. Good ventilation after repair prevents recurrence of moisture problems.
Using Detection Tools Effectively
Simple tools like flashlights, smoke pencils, or thermal cameras help locate hidden leaks. These tools make invisible air movement visible. Professionals use advanced equipment for complex systems. Homeowners can achieve good results with basic detection methods. Proper tool use speeds up accurate diagnosis.
Common Leak Locations
Most leaks occur at dryer connections, wall outlets, or elbow joints. Long horizontal runs develop problems more frequently. Outdoor vent hoods often leak if not sealed well. Knowing typical locations focuses your inspection efforts effectively. Targeted checks save time during troubleshooting.
Repairing Leaking Dryer Vents
Repairing leaking dryer vent issues requires careful steps and proper materials. Begin by unplugging the dryer and moving it safely away from the wall. Clean all surfaces before applying new seals or tape. Use metal foil tape or clamps designed for dryer vents instead of regular duct tape. Replace damaged hose sections completely when necessary.
Reassemble everything tightly and test for remaining leaks. Professional help is recommended for difficult or hidden leaks. Correct repairs restore full system performance and safety. Quality materials ensure longer-lasting results after repair.
| Issue Type | Common Symptoms | Likely Causes | Repair Difficulty | Recommended Fix | Prevention Strategy |
| Connection Leaks | Lint around joints, warm air escape | Loose clamps, worn gaskets | Easy | Tighten clamps, replace seals | Regular connection checks |
| Hose Cracks/Holes | Visible damage, reduced airflow | Age, physical wear | Medium | Replace damaged hose sections | Use rigid metal ducts |
| Wall Outlet Leaks | Lint buildup behind dryer | Poor sealing, movement | Medium | Reseal with proper tape | Secure installation |
| Elbow/Joint Failures | Hissing sounds, moisture nearby | Too many bends, pressure | Medium | Replace elbows, reduce bends | Minimize duct turns |
| Outdoor Hood Leaks | Weak exhaust, backdraft | Damaged flaps, debris | Easy-Medium | Clean and repair hood | Clear debris seasonally |
| Full Duct Damage | Multiple symptoms combined | Rodents, long-term neglect | Hard | Professional full replacement | Annual professional inspections |
| Seal Degradation | Gradual increase in leaks | Low-quality materials | Easy | Apply high-quality foil tape | Choose proper materials initially |
| Installation Errors | Immediate or early leaks | Wrong materials or setup | Medium-Hard | Correct installation issues | Follow manufacturer guidelines |
Preventing Future Leaking Problems
Preventing future leaking dryer vent issues involves ongoing maintenance and smart choices. Install rigid metal ducts where possible for better durability. Avoid excessive bending in the vent path during setup. Schedule regular inspections to catch small problems early.
Clean the system thoroughly at recommended intervals. Use high-quality materials and clamps for all connections. Teach household members proper dryer use habits. These preventive measures reduce leak frequency significantly. Consistent care keeps the entire vent system reliable and efficient.
Choosing Quality Materials
Select rigid or semi-rigid metal ducts instead of flexible plastic whenever possible. High-quality clamps and foil tape designed for dryers provide better seals. Avoid generic materials that degrade quickly. Proper material selection prevents many leaking issues from developing. Initial investment in quality pays off through fewer repairs.
Proper Installation Practices
Ensure the vent duct follows the shortest, straightest path possible. Secure all connections firmly during installation. Maintain a slight downward slope toward the exterior when feasible. Professional installation is worthwhile for complex setups. Good practices from the start minimize leaking risks long-term.
Regular Maintenance Routines
Develop routines that include monthly visual checks and periodic deep cleaning. Empty lint traps after every load to reduce system pressure. Inspect hoses and connections regularly for early wear signs. These habits prevent small issues from becoming major leaks. Maintenance keeps the system performing optimally.
Monitoring Dryer Performance
Pay attention to changes in drying time, noise levels, and energy use. These indicators often signal developing leaks early. Track performance patterns over months for better awareness. Prompt response to changes prevents escalation. Monitoring supports proactive rather than reactive care.
Professional Inspection Benefits
Professional inspections identify hidden leaks and potential problems effectively. Experts use specialized tools for thorough assessment. They provide recommendations tailored to your specific setup. Scheduled professional visits complement home maintenance efforts. Expert input ensures comprehensive leak prevention.
When to Replace Instead of Repair
Consider full replacement when multiple leaks appear or materials are very old. Severe damage or repeated repair needs often justify new ducts. New systems offer improved efficiency and reliability. Weigh repair costs against long-term benefits of replacement. Making the right choice avoids ongoing issues.
Solutions for Persistent Leaking Issues
For persistent leaking dryer vent issues, comprehensive solutions often work best. Combine duct replacement with improved routing and sealing. Add vent booster fans in challenging installations if recommended. Consider upgrading the entire exhaust system for better performance.
Address any secondary damage from previous leaks. Long-term solutions focus on root causes rather than symptoms. Professional guidance helps develop effective strategies. Persistent problems require thorough evaluation and complete fixes.
Conclusion
Leaking dryer vent issues can affect efficiency, safety, and comfort in your home if left unaddressed. Recognizing causes, symptoms, and dangers helps you take appropriate action quickly. Simple inspections and quality repairs resolve most leaking problems effectively. Preventive maintenance and proper materials reduce the likelihood of future leaks significantly.
Regular care combined with timely repairs keeps your dryer operating safely and efficiently. Understanding these issues empowers Dryer Vent Cleaning Los Angeles better household management decisions. A well-maintained vent system improves drying results and lowers energy costs over time.
FAQs
1. What causes most leaking dryer vent issues?
Most leaks come from cracked hoses, loose connections, or poor initial installation. Aging materials and physical damage also contribute. Regular wear from dryer movement worsens small gaps over time. Proper materials and installation prevent many common causes.
2. How do I know if my dryer vent is leaking?
Look for lint around connections, feel for escaping warm air, or notice longer drying times. Reduced outdoor exhaust and unusual sounds are also indicators. Simple tests with smoke or your hand can confirm leaks. Early detection makes repairs easier.
3. Are leaking dryer vents dangerous?
Yes, leaks increase fire risk from escaping lint and can cause moisture damage leading to mold. Poor exhaust affects indoor air quality and appliance efficiency. Addressing leaks promptly maintains safety for your home.
4. Can I fix leaking dryer vents myself?
Many minor leaks can be fixed with basic tools, new tape, and clamps. Replace damaged sections when necessary. Complex or hidden leaks may require professional assistance. Always unplug the dryer before working on it.
5. What materials work best for repairing leaks?
Use metal foil tape and clamps specifically designed for dryer vents. Rigid metal ducts provide the most durable solution. Avoid plastic tape or materials not rated for high heat. Quality materials ensure longer-lasting repairs.
6. How often should I check for dryer vent leaks?
Check connections and hoses monthly during regular cleaning. Perform more thorough inspections every six months. Heavy usage may require more frequent attention. Consistent monitoring prevents small leaks from growing.
7. Will fixing leaks improve drying time?
Yes, repairing leaks restores proper airflow and reduces drying times significantly. The dryer operates more efficiently with sealed vents. Energy consumption usually decreases after proper repairs. Performance improvements are often noticeable immediately.
8. Should I replace the entire vent system?
Consider full replacement if multiple leaks exist or materials are very old. Severe damage or repeated problems justify new installation. New systems often provide better long-term reliability and efficiency.
9. How much does repairing leaking dryer vents cost?
Costs vary depending on the extent of damage and whether professional help is needed. Simple fixes are inexpensive while full replacements cost more. Professional service ensures proper results for complex issues.
10. How can I prevent leaking dryer vent issues?
Use quality rigid ducts, minimize bends, and secure all connections properly. Perform regular cleaning and inspections. Avoid overloading the dryer and maintain good habits. Preventive care reduces leak frequency dramatically.